
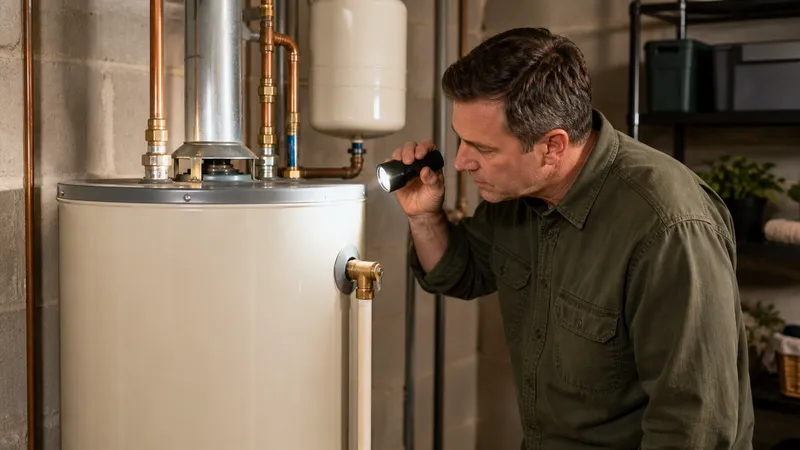
The complete tank water heater maintenance guide: parts, a task-by-task schedule, and the T&P valve safety test most homeowners skip.
Key takeaways
- A tank water heater is six parts working together: tank, dip tube, anode rod, heat source, thermostat, and T&P valve. Maintenance means checking each on its own schedule.
- Test the T&P valve once a year by lifting its lever—no water discharge means the valve needs replacing, not a wait-and-see approach.
- A T&P valve that drips slowly is often thermal expansion, not failure. One that dumps large volumes of very hot water usually means the thermostat has failed.
- Flush, anode rod, and tankless descaling each have their own deep-dive page—this page is the routing map, not a rewrite of any of them.
- Stop for gas control valve or thermocouple work, T&P valve replacement itself, venting, electrical work on an electric unit, and any active leak at the tank's base.
Water heater maintenance is six separate jobs on six separate schedules, not one annual visit: a sediment flush, an anode rod check, a T&P valve test, a temperature check, and—on a gas unit—a look at the burner and venting. This page is the master map. The annual flush, anode rod replacement, lifespan and repair-vs-replace call, tankless descaling, popping-noise diagnosis, and full annual service walkthrough each own one slice in depth. This page ties them together and covers the one job none of them dig into: the temperature and pressure relief valve test.
What’s actually inside a tank water heater
A tank water heater looks like a sealed metal cylinder, but six parts do the work, and each one fails or wears out differently.
| Part | What it does | How it fails |
|---|---|---|
| Steel tank (glass-lined) | Holds 30–80 gallons of hot water under pressure | Corrodes from the inside once the anode rod is gone; a corroded tank leaks and cannot be repaired |
| Dip tube | Feeds incoming cold water to the bottom of the tank so hot water stays layered at the top | A cracked or disintegrated tube lets cold water mix at the top, giving lukewarm water despite a full tank |
| Anode rod | Sacrificial metal rod that corrodes instead of the tank’s steel lining | Consumed over years; once bare, the tank’s steel becomes the next target |
| Heat source | Gas burner and thermocouple, or one to two electric heating elements | Thermocouple failure stops gas flow (a safety feature); elements burn out and stop heating |
| Thermostat / gas control valve | Senses water temperature and cycles the heat source to hold the set point | Miscalibration causes temperature swings; failure can leave the burner or element running too long |
| T&P relief valve | Opens automatically if temperature or pressure exceeds a safe limit, before the tank can rupture | Seizes shut from mineral scale, or drips from thermal expansion or a failing thermostat |
Sediment builds where cold water enters at the dip tube and settles near the burner or lower element—that’s the mechanism behind both the annual flush and the popping and rumbling noise a neglected tank develops. The anode rod and the T&P valve are the two safety-adjacent parts: one prevents the tank from corroding, the other prevents it from over-pressurizing.
The maintenance-by-task table
Use this as the index. Each row is one job, one cadence, and the page that covers it in full.
| Task | Cadence | DIY or pro | Deep dive |
|---|---|---|---|
| Sediment flush (tank units) | Annually; every 6 months with hard water | DIY, 30–60 min | How to flush a water heater |
| Anode rod inspection | At year 3, then annually (from year 1 with a softener) | DIY inspection; pro if seized | Anode rod replacement |
| T&P valve test | Annually, minimum | DIY, 2 minutes | Covered below |
| Temperature check | Annually or after any thermostat change | DIY, thermometer at the tap | When to service your water heater |
| Descaling (tankless units) | Annually; every 6 months with hard water | DIY with isolation valves, or pro | Tankless water heater maintenance |
| Popping or rumbling diagnosis | As it occurs | Diagnose first, then flush or call a pro | Why does my water heater make noise? |
| Repair vs. replace decision | When a part fails or the unit passes 8–10 years | Depends on the part and age | Water heater lifespan guide |
The T&P valve test: the safety check most homeowners skip
The temperature and pressure relief (T&P) valve is the one part on this list that exists purely as a safety device—it doesn’t heat water, filter sediment, or extend the tank’s life. Its only job is to open automatically if the tank’s internal temperature or pressure crosses a safe threshold, venting hot water and steam before the tank itself can rupture. Every gas and electric tank water heater has one, mounted on the top or side of the tank with a discharge pipe running down toward the floor.
A.O. Smith’s own service documentation is direct about why this matters: “if the valve doesn’t operate correctly, the tank can over-pressurize”—the valve is the last line of defense if the thermostat or gas control valve fails and lets the tank keep heating past its normal cutoff (A.O. Smith: Water Heater Maintenance).
How to test it
- Locate the valve and its discharge pipe. It’s usually a lever-topped valve near the top of the tank, with a pipe running down to within a few inches of the floor or to a drain.
- Stand clear of the discharge pipe’s outlet—hot water will come out of it during the test.
- Lift the test lever partway, then let it snap back. A.O. Smith’s guidance describes this as opening and closing the valve “a few times to make sure water is discharged from the tank” (A.O. Smith: Water Heater Maintenance).
- Confirm a clean discharge of hot water through the pipe, and confirm the valve reseats and stops flowing once the lever is released.
A.O. Smith recommends this consumer test once a year, with a professional inspection every 5 years (A.O. Smith: Water Heater Maintenance). Rheem’s own service guidance suggests testing every 6 months, and ties the reminder to a date that’s easy to remember—checking the valve when the clocks change for daylight saving time.
What a test result actually means
| What happens when you test it | What it means | What to do |
|---|---|---|
| Clean discharge of hot water, valve reseats and stops | Valve is working | Nothing—recheck on schedule |
| No flow, or only a trickle | Valve has likely seized with mineral scale or corrosion | Replace the valve now; do not wait for the next test |
| Slow, intermittent drip after testing, no other symptoms | Often thermal expansion in a closed plumbing system, not valve failure | Have a plumber check for a missing expansion tank or backflow preventer before replacing the valve |
| Large volume of very hot water discharging on its own | Thermostat or gas control has likely failed, overheating the tank | Stop using the unit and call a technician immediately |
| Continuous dripping regardless of cause | The valve is not sealing reliably | Replace it—a valve that leaks under normal pressure is not trustworthy under a real overpressure event |
A.O. Smith’s technical bulletin on leaking relief valves draws the same distinction: intermittent weeping from thermal expansion is a plumbing-system issue, while a valve discharging in large volumes on temperature is caused by a malfunctioning thermostat, not the valve itself (A.O. Smith Bulletin 52: Leaking T&P Valve). Seepage at the point where the valve is welded into the tank (the spud) is different again—that connection isn’t repairable, and it means the tank, not the valve, needs replacing.
Gas vs. electric: what changes
| Gas | Electric | |
|---|---|---|
| Heat source | Burner with a thermocouple and gas control valve | One or two heating elements |
| Homeowner-safe checks | Flame color (should be blue), pilot relight per the manual | Breaker check, visual inspection only |
| Where DIY stops | Gas valve repair, pilot that won’t stay lit, any venting work | Any work at the element, thermostat, or wiring |
| Extra annual item | Venting and flue draft | None beyond the shared schedule above |
When to call a professional
| Situation | Why it is not DIY |
|---|---|
| Gas control valve or thermocouple issues | Combustion and gas-leak risk; requires licensed diagnostic tools |
| Replacing the T&P valve itself (not just testing it) | Wrong valve rating or a bad reseal can defeat the safety device it’s meant to be |
| Venting problems (blocked flue, damaged vent pipe, backdrafting) | Affects combustion safety and carbon monoxide risk |
| Any electrical work on an electric unit (elements, thermostat, wiring) | Requires the breaker confirmed off and a multimeter to work safely |
| Active leaks at the tank’s base | Usually means the tank itself has failed—this is a replacement decision, not a repair |
Related guides
Frequently asked questions
What parts make up a typical tank water heater?
A steel tank with a glass or enamel lining, a dip tube that feeds cold water to the bottom, a sacrificial anode rod, a heat source (gas burner and thermocouple, or electric heating elements), a thermostat or gas control valve, and a temperature and pressure (T&P) relief valve near the top. Each part has its own maintenance schedule.
How often should I test the T&P valve on my water heater?
Test it once a year at minimum. A.O. Smith’s own service guidance calls for a consumer test annually and a professional inspection every 5 years. Lift the valve’s test lever partway, let it snap back, and confirm hot water discharges cleanly through the overflow pipe.
What does it mean if my water heater’s T&P valve doesn’t discharge water when tested?
A T&P valve that produces no flow, or only a trickle, when you lift the test lever has likely seized shut with mineral deposits or corrosion. That means it will not open if the tank actually over-pressurizes, so replace it—do not wait for the next annual test.
Is a dripping T&P valve always a sign it’s failing?
No. A.O. Smith’s technical guidance distinguishes a slow, intermittent drip—usually thermal expansion in a closed plumbing system, fixed with an expansion tank—from a valve dumping large volumes of very hot water, which points to a failed thermostat overheating the tank. Constant dripping either way still means the valve should be replaced, since a valve that leaks under normal pressure won’t seal reliably under a real overpressure event.