
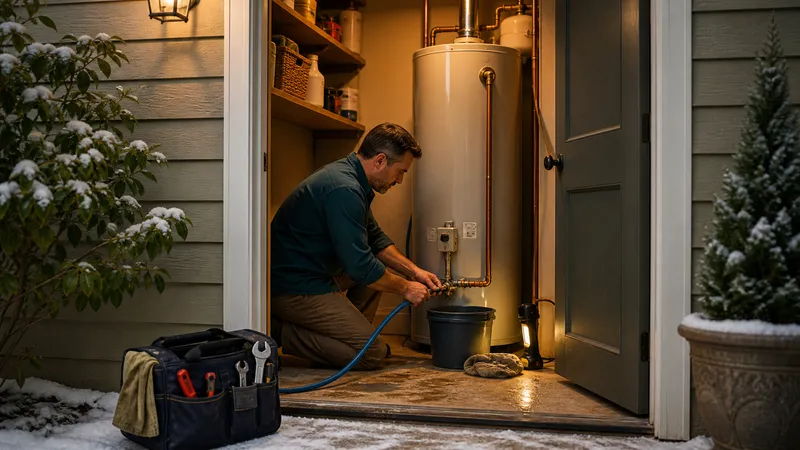
Water heaters need a full flush once a year (twice with hard water), plus anode rod checks and a T&P valve test. Here's the step-by-step and 2026 costs.
Key takeaways
- Flush a tank water heater once a year; every 6 months if you have hard water, per Rheem's own service guidance.
- Set the thermostat to 120°F: CPSC's scald data and the 120°F Legionella threshold meet at that number.
- Inspect the anode rod at 3 years, then annually—sooner every year with a water softener, per A.O. Smith's manual.
- Test the T&P valve once a year by lifting the lever; no water flow means replace the valve, not the tank.
- Tankless units need annual descaling, not flushing—hard water can push that to every 6 months.
- DIY flush costs under $10 in supplies; a professional flush runs $80–$200 in 2026, per Angi.
A tank water heater needs a full sediment flush once a year—every 6 months if you have hard water—plus an anode rod check and a T&P valve test on the same annual cycle. Tankless units skip the flush entirely and need an annual descaling instead. The spring and fall checklists mention this in a line or two; this page is the full procedure, the reasons behind each interval, and what a technician actually does that you can’t.
Annual water heater maintenance schedule
| Task | Cadence | Why | DIY or pro |
|---|---|---|---|
| Full tank flush | Once a year; every 6 months with hard water | Clears sediment that insulates the heating element and causes noise | DIY (30–60 min) |
| Anode rod inspection | At 3 years, then annually (annually from year 1 with a water softener) | Sacrificial rod corrodes instead of the tank; a bare rod means the tank corrodes next | DIY inspection; pro replacement if seized |
| T&P valve test | Once a year | Confirms the pressure-relief safety device still opens under pressure | DIY (2 minutes) |
| Temperature check | Once a year, or after any thermostat adjustment | 120°F balances scald risk against Legionella growth | DIY (thermometer at the tap) |
| Tankless descaling | Once a year; every 6 months with hard water | Clears mineral scale from the heat exchanger; tankless has no sediment layer to flush | DIY with isolation valves, or pro |
How to flush a tank water heater
This is a strictly sequential job—do the steps in order, not as a checklist you can reshuffle.
- Turn off the power or gas. Electric: switch off the breaker to the water heater. Gas: turn the gas control valve to “pilot” or off, per your model’s manual.
- Let the water cool if you’ve used hot water recently, or run the water heater’s hot tap for a minute to confirm it’s not scalding before you work near the tank.
- Close the cold water supply valve at the top of the tank.
- Connect a garden hose to the drain valve near the bottom of the tank and route the other end to a floor drain, outside, or a large bucket.
- Open a hot water faucet elsewhere in the house to break the vacuum and let the tank drain.
- Open the drain valve and let the tank empty completely.
- Flush with the cold supply. Briefly reopen the cold water inlet in short bursts to stir up and clear remaining sediment, letting it run out the hose until the water runs clear.
- Close the drain valve, disconnect the hose, and close the hot faucet you opened in step 5.
- Refill the tank by opening the cold water supply valve fully and leaving a hot faucet open until water flows steadily (this clears air from the line).
- Restore power or gas and relight the pilot if applicable, following your model’s manual.
Rheem’s own service guidance for tank water heaters recommends this flush once a year for most households, or every 6 months with hard water (Rheem: How Often to Flush Your Water Heater).
Why sediment matters
Sediment—minerals that settle out of hard or moderately hard water—collects at the bottom of the tank, between the water and the heating element or gas burner. Rheem’s guidance identifies three concrete effects: the sediment layer acts as insulation, forcing longer heating cycles and higher energy use; it’s the direct cause of the rumbling or popping noise many tanks develop with age, as trapped water boils under the sediment crust; and left unaddressed, it shortens the tank’s working life by putting the heating components under more strain (Rheem). If your tank has started popping or rumbling and hasn’t been flushed in over a year, treat that as the sediment layer talking, not a failing heater—flush first.
120°F: the number that balances two risks
Set the thermostat, then confirm with an actual thermometer at the tap farthest from the tank—dial markings on older thermostats are frequently off by 10°F or more. If your household includes young children, older adults, or anyone with reduced sensation or mobility, CPSC’s data is the reason to stay at or below 120°F rather than nudge it up for a hotter shower (CPSC 5098).
Anode rod: the part that fails first, on purpose
The anode rod is a metal rod (magnesium, aluminum, or an aluminum/zinc alloy) that corrodes instead of the steel tank—that’s its job. Once it’s consumed, the tank’s interior lining takes the corrosion instead, and that’s the failure mode that ends in a leaking tank.
A. O. Smith’s own service documentation calls for inspecting the anode rod after a maximum of 3 years, then annually thereafter, with the condition of the rod (not the calendar) deciding when to replace it. Households with a water softener should inspect annually starting from year one, because softened water accelerates anode consumption (A. O. Smith service documentation, via ManualsLib). A rod that’s more than half consumed, or where the steel core wire is visibly exposed, should be replaced rather than reinstalled.
Anode rod material, thread size, and inspection interval vary by manufacturer and model. A. O. Smith’s 3-year-then-annual interval is a real example, not a universal rule—your own unit’s manual wins if it specifies something different.
T&P valve: test it, don’t skip it
The temperature and pressure relief (T&P) valve is the safety device that prevents a water heater from becoming a pressure vessel if the thermostat or gas control fails. Testing it is simple and takes about two minutes: lift the valve’s test lever partway, let it snap back, and confirm hot water discharges cleanly through the overflow pipe. No flow, a trickle, or a valve that won’t stop dripping afterward means the valve needs replacement—not a wait-and-see approach, since this is the device that prevents a tank rupture.
Tank vs. tankless: different service, different intervals
| Tank | Tankless | |
|---|---|---|
| What builds up | Sediment layer at the tank bottom | Mineral scale inside the heat exchanger |
| Annual service | Full flush (drain and refill) | Descaling flush with isolation valves and a pump or vinegar solution |
| Hard-water interval | Every 6 months | Every 6 months |
| Typical lifespan | 8–12 years | 15–20 years |
| Anode rod | Yes—inspect at 3 years, then annually | No—no storage tank to protect |
| T&P valve | Yes—test annually | Yes—most models include one; test per manual |
Lifespan and service-type figures are from manufacturer guidance: Rheem’s tank-vs-tankless lifespan comparison and A. O. Smith’s service documentation both put tank units at roughly 8–12 years and tankless units at roughly 15–20 years, largely because tankless units never hold standing water long enough to build a sediment layer or accelerate tank-wall corrosion (Rheem: Tank vs. Tankless Lifespan Comparison). That advantage disappears fast if descaling gets skipped—mineral scale restricts flow through the heat exchanger and can trigger error codes, overheating, or reduced output long before 15 years.
Gas vs. electric: what a technician checks that you don’t
| System | Technician-only check | Why it’s not DIY |
|---|---|---|
| Gas | Burner flame color and pattern, gas valve operation, flue draft, venting | Combustion and CO safety; requires combustion analysis tools |
| Gas | Pilot relight if it won’t stay lit after your own attempt | Repeated relight failure often signals a thermocouple or gas valve issue |
| Electric | Heating element resistance test, thermostat calibration | Requires a multimeter and power disconnected at the panel |
| Both | Full anode rod removal if seized | Corroded rods can shear off in the tank, requiring specialized extraction |
| Both | Pressure and leak test after any part replacement | Confirms the fix holds under real operating pressure |
2026 cost: DIY vs. professional
| Job | DIY cost | Professional cost (2026) | Source |
|---|---|---|---|
| Tank flush | Under $10 (hose, bucket) | $80–$200, averaging around $160 | Angi: Water Heater Flush Cost |
| Anode rod replacement | $20–$50 for the rod | $150–$400 installed | Angi anode rod / contractor cost data |
| Tankless descaling | $25–$120 (DIY kit) | $150–$400, most jobs $200–$300 | Angi: Tankless Water Heater Cost Data |
National averages vary by region, access, and whether the technician finds anything beyond routine service (a seized anode rod, a corroded drain valve). Get a written scope before the visit, not just a quoted number.
When to call a professional
| Situation | Why it is not DIY |
|---|---|
| Gas pilot won’t relight after following the manual | Thermocouple or gas valve failure; do not force it |
| Anode rod is seized or rounds off when you try to loosen it | Impact wrench and extraction technique specific to the fitting; forcing it can crack the tank fitting |
| T&P valve won’t stop discharging, or shows no flow when tested | Safety-critical part; replace immediately, don’t defer |
| Rust-colored water, a leaking tank, or water at the base | Tank failure is likely; a leaking tank needs replacement, not a flush |
| Gas smell or a yellow/orange burner flame | Emergency: leave and call your gas utility or 911, then a technician |
| Tankless unit displaying an error code you can’t clear per the manual | Heat exchanger or gas/electrical fault requires diagnostic tools |
A visual check, a photo of the label and any corrosion, and a booked appointment are often the right next step—that’s not a failure to DIY it yourself.
Related guides
Frequently asked questions
How often should a water heater be serviced?
Flush the tank once a year to remove sediment—every 6 months if you have hard water. Check the anode rod at year 3, then yearly, and test the T&P valve once a year. Tankless units need annual descaling instead of a flush.
What temperature should my water heater be set to?
120°F. CPSC’s scald data shows even 120°F water can cause a burn after roughly 5 minutes of exposure, while water above 140°F causes a burn in 6 seconds—and 120°F is also the practical floor for keeping Legionella bacteria from multiplying in the tank.
Do tankless water heaters need to be flushed like tank models?
No. Tankless units don’t store standing water, so there’s no sediment layer to flush. Instead, they need an annual descaling flush to clear mineral scale from the heat exchanger—more often with hard water. Follow your model’s manual for the exact interval and method.
What temperature should I set my water heater to?
120°F is the setting most sources land on: the DOE and EPA point to it as the temperature that limits scald risk while still running too hot for Legionella bacteria to thrive. Going lower to save energy raises the bacteria-growth risk; going higher raises both the scald risk and your energy bill.