
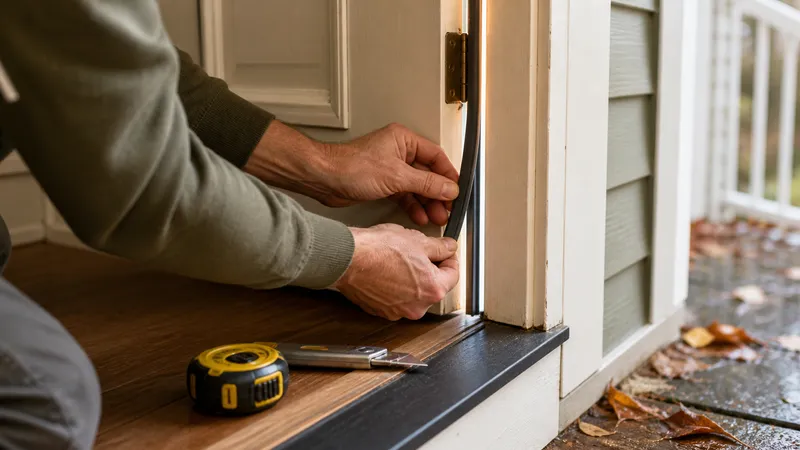
How to find drafts, choose V-strip, foam, felt, or a door sweep, and apply weatherstripping correctly—plus 2026 DIY and pro cost ranges.
Key takeaways
- Find drafts with a lit incense stick on a windy day—DOE says a sideways smoke stream marks the leak.
- Sealing air leaks with caulk and weatherstripping can cut heating and cooling costs 10%–20%, per DOE.
- V-strip (tension seal) and door sweeps hold up for years; foam tape and felt wear out in 1–2 seasons.
- DIY materials run roughly $10–$150 for a whole house; professional installation often runs $600–$2,000+ in 2026.
- Apply caulk-based sealing only above the temperature on the tube label—commonly 40°F–50°F—or it won't cure.
- Replace weatherstripping when it's cracked, flattened, or a dollar bill slides out easily with the door shut.
Weatherstripping windows and doors is a same-day DIY job: find the draft, pick a material that matches the gap (V-strip, foam tape, a door sweep, felt, or a tubular rubber gasket), then clean, measure, cut, and press it into place. Do it whenever a door or window feels drafty—fall is the common trigger because heating season is close, but a leak found in March is worth fixing in March. Sealing air leaks like these—weatherstripping plus caulking the gaps that don’t move—can cut heating and cooling costs by 10%–20% a year, according to the DOE Energy Saver guide.
How to find the drafts you’re about to seal
The DOE Energy Saver guide’s own method is low-tech: on a windy day, hold a lit incense stick or a smoke pen next to window and door frames, electrical boxes, and other wall penetrations. If the smoke stream travels horizontally instead of drifting straight up, you’ve located an air leak. A candle works the same way, but keep any open flame away from curtains, trim, or anything else flammable—incense is the safer choice indoors.
On a calm day, skip the smoke and run a bare hand slowly around the frame instead—you’re feeling for moving air, not just a temperature difference at the glass.
For a door specifically, a widely used homeowner check is closing it on a dollar bill at several points along the jamb. If the bill slides out with little resistance, the seal isn’t doing its job. That’s a homeowner rule of thumb, not a DOE test, but it’s a fast way to confirm new weatherstripping is actually compressing once it’s installed.
Types of weatherstripping compared
| Type | Typical lifespan | Cost (2026) | Best use |
|---|---|---|---|
| V-strip / tension seal | Several years | ~$0.50–$1/ft (vinyl); more for metal | Door and window sides, jambs, sliding sashes |
| Foam tape (open or closed-cell) | 1–2 seasons | ~$0.20–$0.75/ft | Low-traffic gaps, irregular surfaces, quick fixes |
| Door sweep | Several years | ~$8–$25 each | Bottom gap of exterior doors |
| Felt | 1–2 seasons, wears fast | ~$0.20–$0.50/ft | Older wood windows, low-traffic sashes |
| Tubular rubber or vinyl gasket | Several years | ~$1–$2/ft | Uneven gaps, garage entry doors, larger compression needs |
The DOE Guide to Air Sealing lists these same categories—tension seal, felt, reinforced foam, rubber tape, door sweeps, and metal gaskets—as the standard DIY options. Material costs above are typical per-linear-foot ranges pulled from current retail and installer pricing; your hardware store’s shelf prices will vary.
How to weatherstrip a door or window
- Clean the frame or jamb. Remove any old, cracked weatherstripping and wipe away dust or old caulk residue so the new material seats evenly.
- Fix the door or sash before you seal it. A DOE weatherization job aid for installers notes that “visible daylight or loose fitting exterior doors are common indicators of air leakage”—tighten hinges or adjust the strike plate first. Sealing over a door that doesn’t close square just hides the real problem.
- Measure each side separately. Top, both sides, and the bottom (for doors) are rarely identical. Buy a few extra feet; a piece cut too short means a second trip to the store.
- Cut to length. Use scissors or a utility knife. Notch the ends of side pieces so they meet the top piece tightly, the way the DOE job aid instructs for exterior doors.
- Install by type. Press or nail V-strip into the jamb or window channel with the seal pointed toward the gap. Peel and press adhesive foam tape or felt onto a clean, dry frame—light pressure only; don’t try to over-compress a large gap with tape meant for a small one. Screw a door sweep to the bottom of the door so the flap or brush just touches the threshold.
- Caulk behind hardware where it’s called for. For a screwed-in sweep or metal channel, the DOE job aid calls for a thin bead of caulk aligned with the screw holes before fastening, for a more durable seal.
- Test the fit. Open and close the door or window fully—it should move smoothly with no forcing—then re-check with the incense-stick or hand test from the section above.
| Tool or material | What it’s for | Stop if |
|---|---|---|
| Tape measure | Measure each frame side separately | — |
| Utility knife or scissors | Cut foam, felt, or V-strip to length | — |
| Screwdriver or drill | Fasten sweeps and metal channel | Screws won’t bite—wood may be rotted; see below |
| Caulk gun (if also caulking) | Seal stationary gaps around the frame | Surface or air temperature is below the tube’s minimum |
Stop and call a carpenter if the door still won’t sit square in the frame after adjusting the hinges and strike plate—that’s a framing problem, not a weatherstripping one.
Caulk, temperature, and cure time
Weatherstripping handles the parts that move—the door slab, the window sash. Caulk handles the parts that don’t—where the frame meets siding, trim, or the sill. Most exterior-grade caulks list a minimum application temperature on the tube, commonly in the 40°F–50°F range, and won’t bond correctly below it. That’s the reason DOE’s own seasonal weatherization guidance times air sealing for a mild fall day rather than the week of a freeze. Apply any caulk-based sealing above that minimum and give it the label’s full cure time before winter puts it to the test.
What weatherstripping actually saves
Air leaks are, in DOE’s own words, “among the greatest sources of energy loss in a home.” Sealing them—caulk, weatherstripping, and sealed penetrations together—can save 10%–20% on heating and cooling bills, per the DOE Energy Saver guide. ENERGY STAR puts the combined effect of sealing and insulating a home at up to 10% off total annual energy bills. Weatherstripping the doors and windows is one slice of that broader air-sealing project—expect it to matter more in an older or draftier house than a newer, tightly built one.
2026 cost: DIY vs. hiring it out
| Scope | DIY materials | Professional, installed | Source |
|---|---|---|---|
| Single exterior door (sweep + V-strip) | $10–$30 | $117–$307 per door | Homewyse |
| Single window | $5–$15 | $118–$308 per window | Homewyse |
| Whole house (several doors and windows) | $60–$150 | $600–$2,000+ | Angi |
What moves the number: labor runs roughly 60% of a professional weatherstripping price, per Angi’s 2026 cost data, so doing the labor yourself is the fastest way to cut the bill. Metal or bronze tension seal costs more up front than foam tape but lasts years longer—cheaper per year of service on a door you use daily. Bundling the job with a broader caulking or insulation project also lowers the per-opening price. These are national 2026 estimator ranges; get a written local quote before budgeting a whole-house job.
When to call a professional
| Situation | Why it isn’t a weatherstripping fix |
|---|---|
| Rotted or water-damaged door or window frame | New weatherstripping won’t seal wood that’s failing structurally—repair or replace the frame first |
| Historic or specialty windows (leaded glass, custom storm sash) | Non-standard channels; a specialty installer protects the glass and finish |
| Door or window that won’t sit square after hinge and strike-plate adjustment | Likely a framing or settling issue, not a seal issue—needs a carpenter |
| Sliding glass or patio door off its rollers or track | A track and roller repair, not a weatherstripping job |
| Storm window or trim work above what you can reach from a stable, low ladder | Fall risk—hire it |
A photo of the gap and the frame’s rough measurements are often enough for a contractor to quote the job without a truck roll.
Related guides
Frequently asked questions
How do I know if my windows or doors need weatherstripping?
Test on a windy day with a lit incense stick near the frame—if the smoke blows sideways instead of drifting up, that’s a leak (a DOE Energy Saver recommendation). On a still day, run a bare hand around the frame instead, or close the door on a dollar bill and see how easily it pulls out.
What is the best type of weatherstripping for exterior doors?
V-strip (tension seal) for the door’s sides and top, plus a separate door sweep for the bottom gap, is the standard combination. It costs more than foam tape but lasts years instead of one or two seasons.
Does weatherstripping really save money on energy bills?
Sealing air leaks—weatherstripping plus caulking stationary gaps—can cut heating and cooling costs 10%–20% a year, according to the DOE Energy Saver guide. Weatherstripping alone is a slice of that, and it matters more in an older, leakier house than a newer, tightly built one.
How much does it cost to weatherstrip a house?
DIY materials for a typical house run roughly $10–$30 per door and $5–$15 per window, or $60–$150 total for several openings. Professional installation, where labor is about 60% of the price, commonly runs $117–$307 per door and $118–$308 per window as of 2026—local quotes vary.
How often does weatherstripping need to be replaced?
There’s no fixed calendar interval—check it, don’t guess. Foam tape and felt often need replacing every 1–2 years; V-strip, door sweeps, and metal gasket types commonly last several years before they crack, flatten, or stop compressing against the frame.