
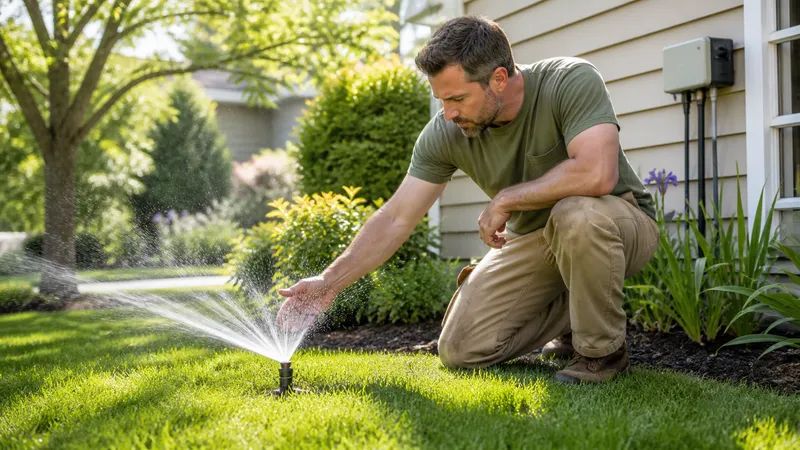
Spring startup checks zone by zone, mid-season head fixes, and the fall blow-out that stops freeze damage—plus safe PSI limits and when to hire a pro.
Key takeaways
- Spring startup: open the main valve slowly, then test every zone for head damage, coverage gaps, and controller/battery issues before the season starts.
- Fall winterization by compressed-air blow-out is the single biggest freeze-damage preventer in cold climates—skip it and expect cracked pipes and heads in spring.
- Blow-out PSI limits are real: max 80 psi for rigid PVC, 50 psi for flexible poly pipe, and never stand over a head or valve while air is running.
- Mowers and trimmers do more mid-season head damage than any other cause—inspect after every few mowings, not just at shutdown.
- Backflow preventer testing is often required annually by local code or your water utility, not just a good idea.
- No air compressor with the right PSI and CFM at home, or a main line break needing excavation? Hire an irrigation pro rather than improvise.
Sprinkler system maintenance comes down to two events on the calendar: spring startup, when you inspect every zone and head for winter damage before running water through the system, and fall winterization, when you blow the water out of the lines with compressed air before the first hard freeze. In cold climates, skipping the fall blow-out is the single most common cause of expensive spring repairs—cracked pipes, split valves, and blown-out sprinkler heads that only show themselves once you turn the water back on. Between those two events, a handful of mid-season checks catch mower damage and clogged nozzles before they waste water or kill patches of lawn.
Sprinkler maintenance by season
| Season | What to check or do | Why it matters |
|---|---|---|
| Spring startup | Confirm soil is frost-free 12 inches deep, open the main valve slowly, run every zone in manual mode, check head alignment and coverage, replace controller batteries | Rain Bird notes most systems operate best between 45–75 psi; opening the valve too fast causes water hammer that can damage fittings |
| Mid-season | Inspect heads after mowing/trimming, clear clogged nozzles, check for low or misting spray (a sign of a cracked head or high pressure), re-check controller schedule against rainfall | Mower and trimmer strikes are the most common cause of head damage during the growing season |
| Fall winterization | Shut off water supply, drain or blow out the lines with compressed air, insulate above-ground backflow components, set controller to rain mode or off | Water left in pipes freezes and expands, cracking pipes, valves, and backflow assemblies—damage that often isn’t visible until spring |
Spring startup, zone by zone
Do a shovel test before you do anything else: if the soil around the yard is still frozen solid 12 inches down, wait. Turning water into pipes surrounded by frozen ground raises the odds of a break you can’t see.
- Inspect the backflow preventer and main valve for visible cracks or damage from the winter freeze, and confirm the drain plug is tight and all valves are closed before you introduce pressure.
- Open the main shutoff valve slowly—a third to half open at first—to let water fill the mainline gradually. Opening it all the way immediately can cause a pressure surge (water hammer) that stresses fittings and joints.
- Set the controller to manual mode and run each zone one at a time rather than trusting the automatic schedule on the first pass.
- Watch each zone run for heads that don’t pop up, spray unevenly, mist instead of spraying, or leak at the base. Clear dirt, sand, and debris from heads, and trim grass that has grown over a head so the stem pops up freely.
- Check the controller for correct date and time and fresh batteries—cold storage over winter can drain a controller’s backup battery even if it’s plugged in.
- Confirm system pressure with a gauge if heads are misting or coverage looks weak. Most residential systems run best in the 45–75 psi range; pressure outside that band usually means a regulator or backflow issue, not a head problem.
Mid-season: the checks between startup and shutdown
Most in-season sprinkler problems are mechanical, not electrical—something got hit, buried, or clogged.
| Symptom | Likely cause | What to do |
|---|---|---|
| Head doesn’t pop up or pops up crooked | Buried by soil, mower strike, tilted riser | Clear debris, re-level or replace the head |
| Uneven spray or dry patches | Clogged nozzle, wrong nozzle for the zone, low pressure | Remove and rinse the nozzle filter; confirm nozzle matches spray radius for that zone |
| Fine mist instead of a stream | Pressure too high, cracked nozzle, worn seal | Check pressure; replace nozzle or head if it’s damaged |
| A zone runs longer than programmed / water bill spikes | Stuck valve, controller wiring issue, undetected leak | Check the valve manually; if it won’t stop, that’s electrical or valve work—stop and call a pro |
| Wet spot in the yard with the system off | Underground line break | Mark the spot; a shallow repair may be DIY, a deep or main-line break needs excavation |
Walk the yard after every few mowings during peak season, not just once. A head that’s been running crooked for a month is wasting water and starving a section of lawn the whole time.
Fall winterization: the blow-out procedure
Colder-climate homes need to get every drop of standing water out of the pipes, valves, and heads before the ground freezes. Manual and automatic drain valves exist, but they rely on gravity and can’t guarantee the lines are actually empty—buried pipe settles and shifts over time, and there’s no way to visually confirm a gravity drain worked. Compressed air is the only way to confirm the water is out.
The general procedure:
- Shut off the water supply to the irrigation system at the main valve, and close or bypass the backflow preventer per its manual.
- Connect an air compressor to the system at the connection point specified for your setup (often a blow-out port near the backflow device or the mainline valve).
- Run each zone, starting with the one farthest from the compressor, until only air—no water—comes out of the heads.
- Keep the pressure within safe limits for your pipe material: a maximum of about 80 psi for rigid PVC pipe, and about 50 psi for flexible polyethylene (poly) pipe, according to compressed-air blow-out guidance from Colorado State University Extension. Sizing the compressor’s air output (CFM) to your system also matters—too little air just pushes water partway down the line instead of clearing it.
- Insulate any above-ground backflow preventer components, and set the controller to rain mode or off for winter.
Wear ANSI-rated eye protection and never stand directly over a sprinkler head or valve while air is running through the system—debris or a stuck cap can eject at speed.
When to call a professional
| Situation | Why it isn’t a DIY job |
|---|---|
| Compressed-air blow-out without a compressor matched to your system’s PSI/CFM needs | Wrong pressure or an undersized compressor can blow a fitting apart under pressure; a rented unit at the wrong specs is a real injury and property-damage risk |
| Backflow preventer annual testing | Many local water utilities and plumbing codes require testing by a state-certified backflow tester as a cross-connection control requirement—this typically isn’t optional or self-certifiable |
| Main line break requiring excavation | Digging near buried electrical, gas, or other utility lines and repairing a pressurized main line is a job for an irrigation or plumbing contractor |
| Controller wiring or electrical faults (tripped breaker, shorted valve wire, no power to the box) | Diagnosing low-voltage wiring faults and any connection to household electrical service is not a visual DIY fix |
A visual check and a booked appointment with an irrigation contractor are the right call once a job moves past a hose bib and a shovel. That’s not a failure to DIY it—it’s how the system avoids becoming a spring repair bill.
For the rest of the systems that share your yard and utility connections—backflow devices, outdoor spigots, and drainage—see the home systems hub.
Frequently asked questions
What is the most important sprinkler maintenance task each year?
Blowing out the irrigation lines with compressed air before the first hard freeze. Water left in pipes, valves, and heads expands as it freezes and cracks fittings, backflow assemblies, and sprinkler bodies—damage that often is not visible until spring startup.
How do I turn my sprinkler system back on in spring?
Check that the soil is frost-free at least 12 inches deep, open the main shutoff valve slowly to avoid a pressure surge, then run each zone in manual mode to check heads, coverage, and the controller before switching to an automatic schedule.
Can I blow out my own sprinkler system, or do I need a professional?
You can do it yourself only if you have a compressor that matches your system’s required CFM and can hold it to a safe PSI—80 psi maximum for rigid PVC pipe, 50 psi for flexible poly pipe. A shop compressor is usually undersized; renting the wrong unit or exceeding those limits risks blown fittings, and a fitting can fail violently under pressure. If you are unsure, hire an irrigation contractor for the blow-out.
How often does a backflow preventer need to be tested?
Many water utilities and local plumbing codes require an annual test by a certified backflow tester, especially for irrigation systems, which are considered a cross-connection risk. Check with your local water utility for the exact requirement in your area.
Why does my sprinkler head spray unevenly or not pop up?
The most common causes are a head buried or tilted by mowing and trimming, a clogged nozzle from dirt or debris, or a broken riser. Clear debris and re-level a tilted head first; if it still doesn’t pop up or seal, the head or its seal usually needs replacing.