
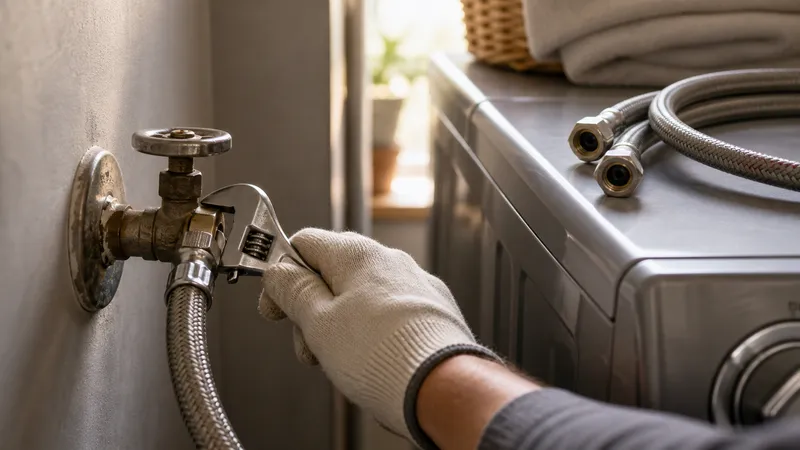
Replace washing machine supply hoses every 3–5 years per IBHS guidance, or sooner at the first bulge or rust ring—here's how to inspect, buy, and swap them.
Key takeaways
- Replace rubber supply hoses every 3–5 years even with no visible damage, per IBHS guidance.
- Braided stainless-steel hoses last longer, but check yearly for bulging or rust at the crimped fitting.
- A burst hose can release roughly 650 gallons an hour—one of the highest-dollar preventable water-damage claims.
- Hand-tighten each connection, then add a quarter-turn with pliers. Overtightening cracks the plastic fitting.
- A 2-pack of braided stainless hoses runs about $15–$30 in 2026; a plumber's swap adds roughly $75–$150 in labor.
- Turn off both shutoff valves before disconnecting a hose, even for a quick inspection.
The washing machine maintenance guide covers the whole appliance; this page is the hose deep dive it points to. Rubber supply hoses are commonly recommended for replacement every 3–5 years, even if they show no visible damage—that interval comes from the Insurance Institute for Business & Home Safety (IBHS), which tracks water-damage claims tied to appliance failures. Braided stainless-steel hoses hold up longer, but they still fail—usually at the crimped fitting, not the braid—so they need the same yearly eyeball check.
Rubber vs. braided stainless steel: the real decision
Both hose types connect the same way—threaded fittings to the wall valves and the back of the machine—but they age differently and cost differently.
| Rubber hose | Braided stainless-steel hose | |
|---|---|---|
| Typical replacement interval | Every 3–5 years, even if it looks fine (IBHS) | Longer service life, but still inspect yearly |
| Common failure mode | Inner rubber goes brittle or swells from the inside; bulges and cracks appear on the outside | Corrosion or a split at the crimped metal fitting where the braid meets the connector—the braid itself rarely bursts outright |
| 2026 cost (2-pack) | Around $8–$15 | Around $15–$30 |
| Visual tell it’s failing | Bulging, cracking, a soft or spongy feel, kinks that never straighten out | Rust streaks or a white/green crust at the fitting, a bulge just past the crimp, or a hose that’s kinked against a wall |
| Housetto verdict | Fine to keep on the replacement schedule, but the failure mode is harder to see coming | Worth the few extra dollars for the reduced burst risk, but don’t treat it as “install and forget” |
Both types share one weak point: the crimped connector where the hose meets the fitting. That’s the seam most manufacturers and insurers point to when they say “inspect,” because it’s the part a factory can’t make perfectly corrosion-proof forever.
How to inspect a supply hose in under two minutes
Pull the washer out a few inches (or just reach behind it) and check both hoses—hot and cold—end to end.
| What to look for | What it means |
|---|---|
| Bulging anywhere along the hose | The inner reinforcement has weakened; replace now, don’t wait for the scheduled interval |
| Cracking or a chalky, dry surface on rubber | Rubber has aged past flexible; replace |
| Rust streaks or white/green crust at the crimped fitting | Corrosion is working on braided-steel hoses here first; replace the hose, not just the washer inside the fitting |
| A sharp kink or the hose pinned flush against the wall | Constant stress at one point accelerates failure at that spot |
| Damp fitting, a faint drip, or a mineral ring on the floor | Active or slow leak—stop using the machine until it’s fixed |
If a hose passes all five checks and it’s under the 3–5 year mark, it’s fine to leave in place. If it fails any one of them, replace it regardless of age.
Why this is a high-dollar preventable claim
Washing machine hose failures show up disproportionately in insurance claims data because the damage compounds while no one’s home. State Farm reported paying nearly $30 million in washing-machine-hose-related homeowner claims in a single year, with an average claim around $10,200—and claims peaked in late summer, when hoses that quietly aged all year finally gave out (State Farm, “A $30M Load of Laundry”). IBHS has separately noted that supply-hose failures make up more than half of washing-machine-related water-damage claims industry-wide. The dollar figure isn’t the hose itself—it’s drywall, flooring, and cabinetry that soak for hours before anyone notices.
Replacing the hoses: shutoff, swap, tighten
- Shut off both valves. Turn the hot and cold shutoff valves (usually a small red/blue handle pair on the wall) clockwise until they stop.
- Disconnect the old hoses. Use pliers if hand-loosening doesn’t budge them—corrosion at the fitting is common by year 3–5. Have a towel ready; some water sits in the line.
- Check the rubber washers. Most new hoses include fresh washers in the fitting. Use them instead of reusing an old, flattened washer.
- Thread the new hose on by hand at both the wall valve and the back of the machine, turning until it stops moving by hand.
- Add a quarter-turn with pliers or a wrench. Hand-tight plus a quarter-turn seats the washer without crushing it. Stop there—overtightening is the most common cause of a cracked plastic fitting or a squashed washer that leaks on the first cycle.
- Open both valves and run one cycle while watching both connections for drips before walking away.
Caveats that change the timeline
| Situation | Adjust the schedule |
|---|---|
| Washer is in a finished space (upstairs laundry, over living space) | Treat the 3–5 year window as a ceiling, not a target—damage below is more expensive |
| Hard water or well water | Mineral buildup accelerates corrosion at the crimped fitting; check twice a year |
| Vacation home or rarely-used laundry | Close both shutoff valves between uses; a hose sitting under constant pressure fails the same whether the machine runs or not |
| Hose already replaced with braided steel at install | Still inspect yearly—braided steel resists bursting but doesn’t resist corrosion at the fitting |
When to call a professional
| Situation | Why it’s not DIY |
|---|---|
| Shutoff valve won’t fully close or is seized | Forcing a stuck valve can snap the stem and turn a hose swap into a wall-repair job |
| Active leak behind a washer near an outlet or power strip | Water and electrical components together are a shock risk |
| Hose fitting is stripped or cross-threaded and won’t seal | Continued force risks cracking the machine’s inlet port, which is a bigger repair than a hose |
| You smell mold or find soft flooring near the washer | Suggests a slow leak has been running longer than a hose swap alone will fix |
Related guides
Frequently asked questions
How often should I replace washing machine hoses?
The Insurance Institute for Business & Home Safety recommends replacing supply hoses every 3–5 years regardless of visible wear, and sooner if you see bulging, cracking, or rust at the crimped fitting.
Are braided stainless-steel hoses really better than rubber?
Yes. Braided stainless-steel hoses resist bursting far better than plain rubber because a steel mesh backs the inner tube, but they still fail—usually from corrosion or a cracked fitting at the connection point, not the braid itself, so they still need a visual check.
How tight should washing machine hose connections be?
Hand-tighten the fitting fully, then give it a quarter-turn with pliers or a wrench. Overtightening can crack the plastic collar or crush the internal rubber washer, which causes the leak you were trying to prevent.
What does a washing machine hose replacement cost in 2026?
A 2-pack of braided stainless-steel supply hoses typically costs $15–$30 at a hardware store. If you hire a plumber for the swap, expect roughly $75–$200 total depending on your market, even though the job itself takes under 15 minutes.